
Luderick fishing is simple provided you observe a few details closely. One of these details is the use of an appropriate float. A float is required to suspend a bait at the depth where the fish are feeding, it then provides a bite indicator and finally it allows time for the bait to be swallowed and for a hook to be set.
Floats come in all sizes and shapes, some people even like to use small bobby corks and eggbeaters to target luderick. I prefer to use a centrepin reel for reasons spelt out in this article. When you use a centrepin it's only natural that you use a long stemmed float. Apart from anything else, a stemmed float gives you some weight to cast when using the centrepin. Stemmed floats can also give you stability in rough water conditions and windy conditions, they drift nicely in a current and can be very visible in all conditions.
Fixed or Running Floats
If you are just starting out you will find it hard to work out which float to purchase. The first thing to decide is whether to use fixed floats or running floats. The good news is that in the great majority of situations, you can use a fixed float, and better still, a running float can be used as a fixed float anyway. A fixed float usually has rubber rings that slide over the top and bottom of the float to fix the line to the float. Running floats generally have an eyelet top and bottom (preferably made of stainless steel). Running floats are only a necessity when you need to fish deeper than a rod length.
Float Stoppers
If you use a running float you will need to use a float stopper. There are several different kinds that you can purchase or you can use the old fashioned way of tying a stopper knot using a piece of wool. I quite like the little rubber stops that you can buy at most tackle stores. The quality of the rubber stoppers is quite variable and when you find a brand you like, stick to that brand.
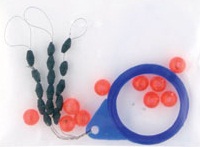
These days I favour the stoppers that you can buy in Korean fishing tackle stores shown in the picture above. They are great stoppers, you can loosen them and move them if you wish, but they don't move once fixed and are very visible, not that visibility of the stopper is a huge issue. I usually use these with larger floats and where you are making longer casts that can tend to move the smaller stoppers. The down side of these stoppers is that they don't move through the guides as well as the smaller rubber stoppers. This is only an issue when you are really using them in running mode where you may be fishing atgreater than a rod length deep.
Size and Buoyancy
This is really a trade off between several factors. You can get away with a pencil float if the conditions are good and you don't have to cast, BUT, I believe you can catch fish even in the most still estuary with a quite heavy ocean float provided it's weighted correctly. Generally you should use a float that suits the location and conditions. Look at the next couple of examples.
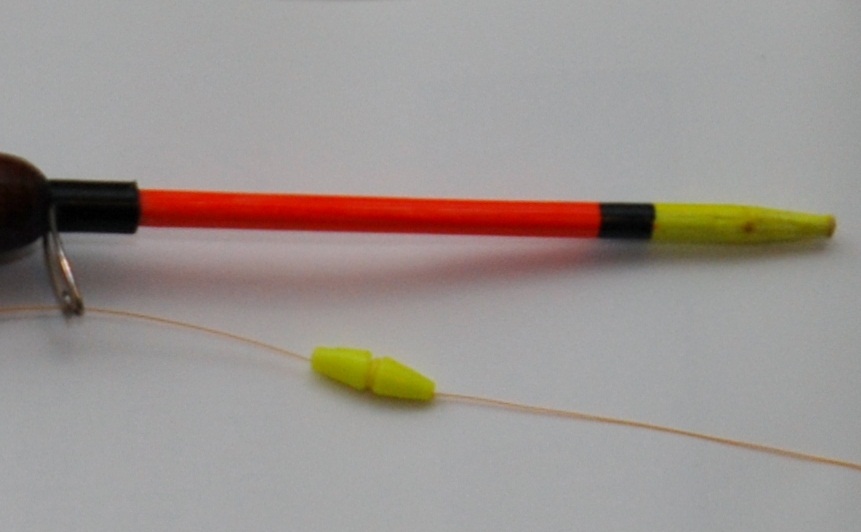
Take a look at the float pictured. This is a typical still water float, the float itself is unweighted, but it's still heavy enough to cast a short distance even on a centrepin. This is a good pictorial representation of a running float used as a fixed float and gives the idea of what weight is required to ALMOST sink the float.
The next picture shows a much heavier float, manufactured with a small amount of lead added to counteract the heavy foam of the float. This is a very cheap float from BigW. I have added some additional lead and heat shrink to make it into a serviceable float. Otherwise you would have to add too much lead to the line.
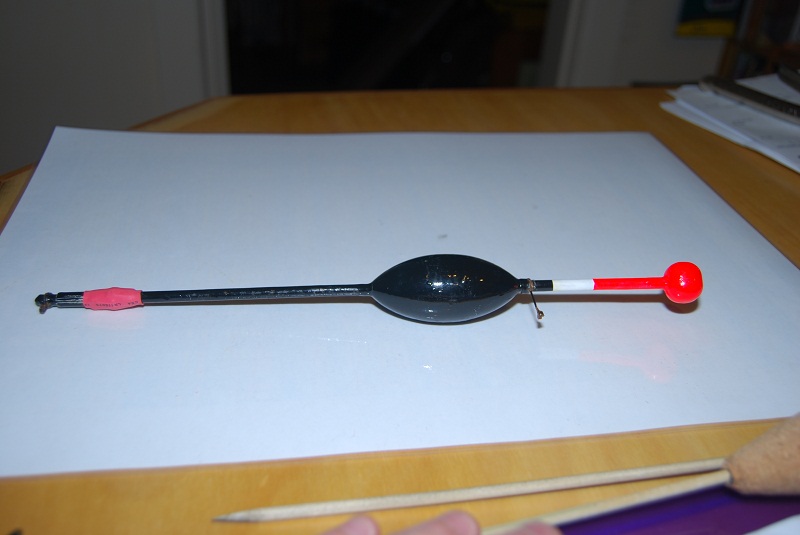
Why is a float with so much floatation necessary ? In rough conditions you want a float that is very stable in the water, rides the swell and doesn't get pushed around too much by white water, and this is how you achieve that balance. The other great thing about a weighted float is that they are easier to cast long distance with a centrepin reel.
Rolling your Own
A float such as the one pictured above can be bought as cheaply as 2-3 dollars and is quite basic and a bit cheap and nasty, but serves a purpose if you don't have much time. To get the perfect float it's best to make them yourself. It's a lot of fun, and very rewarding when you catch fish using home made floats. You can get as basic or as intricate as you want depending on time. For Materials use timber such as cedar, surfboard foam or champagne corks. 4mm bamboo skewers from 2 dollar shops are great for stems, and get hold of some stainless wire to make eyelets. Sealing, staining or painting can turn them into works of art.
Here is a recipe for a heavy ocean float which I have used with a lot of success.
You will need a 300mm x 4mm bamboo skewer, a champagne cork, 100mm of 8mm dowel, stainless wire, a size 1 ball sinker, 2 part epoxy, sealer and paint and woodglue.
Drill a 2mm hole through the vertical axis of the champagne cork.
Screw a wood screw through the hole, use one long enough to stick through by about an inch, as in the picture below. Note that in the picture below, the float has already been fashioned from the champagne cork.
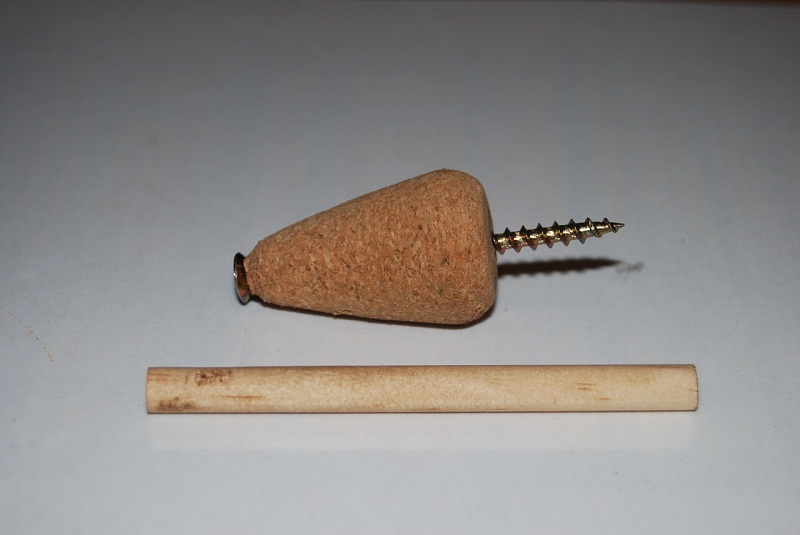
Fix the screw in a drill, preferably a pedestal drill, but you can use a handrill in a vice. Use a rasp to shape the cork as required, the one pictured is a good shape for a heavy ocean float. Finish with a fine file and a fine sanding block. Obviously if you want a finer float, fashion the cork to whatever shape you require.
Remove the screw and feed a 300mmx4mm bamboo skewer through the cork as shown below. Drill a 4mm hole in one end of a 100mm length of 8mm dowel, this then fits over the end of the skewer and is glued in place and onto the cork with a liberal amount of woodglue.
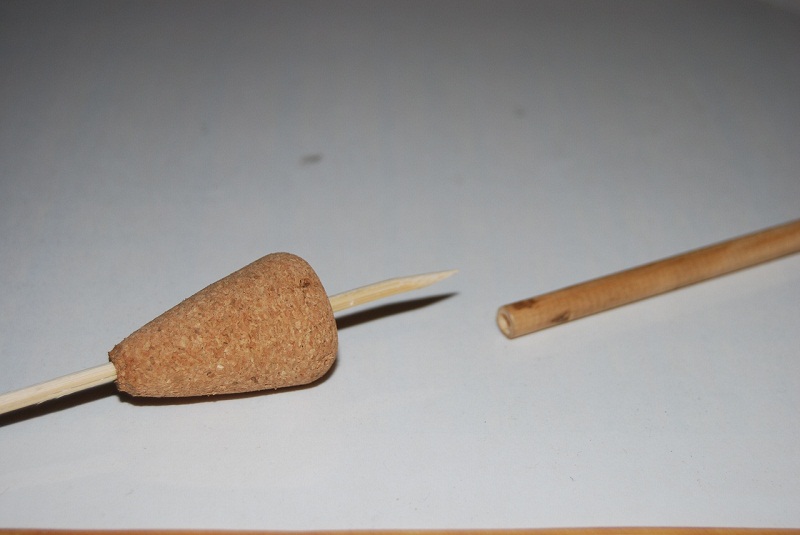
Then drill a 4mm hole in a 10g ball sinker. You will need to do a 2mm hole first, then cut with a 4mm drill from each side. This is then slid up the stem at the bottom of the float and glued or epoxied into place. Note that the 10g sinker is OK to weight the fchampagne cork pictured, if you make a finer float, you won't require as much lead.
Now seal the float with a waterproof sealer and then paint as appropriate, preferably with a visible fluoro colour on the dowel top piece.
You can now decide whether you want to use the float as a running float or a fixed float. If you want to take the easy option and you never fish more than a rod length, then all you need are two pieces of plastic sleeve, one 4mm and the other 8mm to slide over the top/bottom and the line.
If you want a running float, fashion some eyelets using stainless wire and bind on much as you would a rod guide and finish with epoxy.
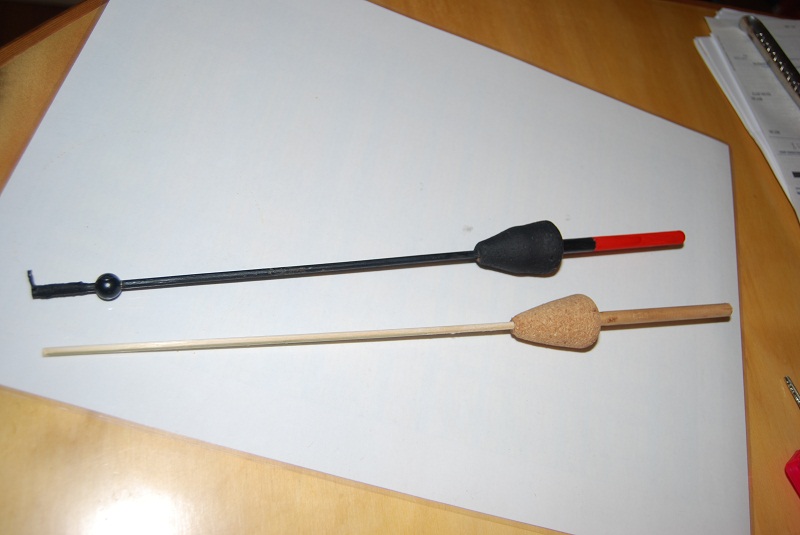
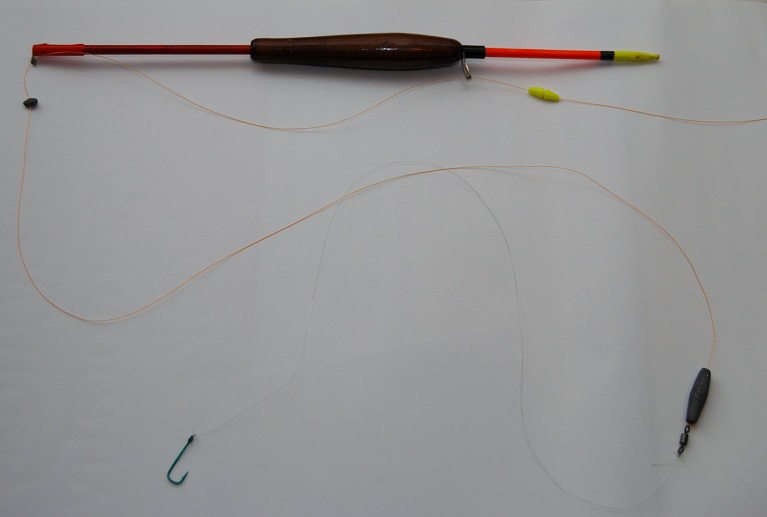
The photo above gives an idea of what can be achieved fairly easily with cheap components. You can vary this recipe as you please, use surfboard foam, cedar etc, different sizes and shapes and so on.
The important thing to remember with floats and blackfish is that pretty much any float can be used provided you weight it properly, so that if the fish breathes the bait in, the float will sink without the poor old fish knowing any different. Otherwise float selection depends on location, turbulence or otherwise of the water, how far the float will drift, how quick the current is and how far you will need to cast.
{jcomments on}